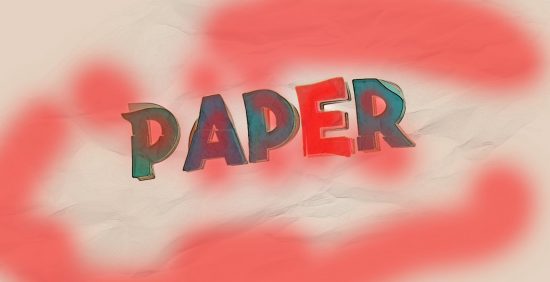
In this Photoshop tutorial, I will show you the process of Creating this Colourful Distorted Warped Text Effect in Photoshop. Have a go!
This is an intermediate level difficulty tutorial and some steps can be tricky.
Note: The Photoshop tutorial is done in Photoshop CC – therefore some screenshot may have slighting different layout as in the earlier version. Some brushes are exclusive to Photoshop CS6.
Here is a preview of the final effect I have for this tutorial: (click to enlarge)
PSD File Download
You can download the PSD File for this tutorial via the VIP Members Area for only $6.95/Month (or less)! You will not only get this PSD File, but also 300+ other PSD Files + Extra Goodies + Exclusive Photoshop tutorials there. Signup now and get exclusive :) Find out more about the VIP Members Areas

OK Let’s get started!
To complete this tutorial, you will need the following stocks:
Step 1
Create a new document sized 1400px * 728px, fill the background layer with the following Gradient Fill:
Load the paper texture into Photoshop and select a piece with Lasso Tool (40px feather):
Copy and paste the selection to our document, position it to the centre:
Change the blending mode of this paper layer to “Multiply” and opacity to 29%:
and here is the effect so far:
Step 2
Use any font you like (I used this one), type some colourful texts onto the canvas:
Convert this text layer to Smart Object:
Warp this text layer as shown below:
Step 3
Apply the following layer blending options to this text layer:
and here is the effect so far:
Step 4
We will add some distort effect for the text in this step. Duplicate the text layer once and rasterize the duplicated layer:
Lighten the duplicated layer with this Hue/Saturation adjustment:
Select a portion of the texts on the duplicated layer:
Select the move tool:
Move the selection slightly:
Use the same technique, go through each letter to create more distort effect:
Step 5
Duplicate the original text layer again and move the duplicated layer to the top. Select a piece of the newly duplicated layer:
Hit Ctrl + T and use the free transform tool to warp this selection:
And this is the shape after I warped the selection:
Repeat this process, warp a few more pieces of the texts as shown below:
Step 6
Create a new layer under the original text layer, then make a selection of the original text layer:
Fill the selection with the following colour:
Again we warp the selection to create a back drop of the letters, as shown below:
Step 7
Let’s add some paper texture over our letters. Copy and paste another piece of the paper texture onto our document:
Set this new paper layer as a clipping mask, and here is the effect so far:
Step 8
We’re almost done! For final touches, we can flatten the layers and duplicate the background layer, apply the following Accented Edges filter to the duplicated layer:
Apply the following layer mask on the duplicated layer:
Add the following vibrance adjustment layer to the texts:
I also painted some particles around texts, and here is my final effect: (click to enlarge)
Till next time, have a great day!


2 Comments
Thanks for this, James. Could you provide some details on how you created the particles? Is there a quicker way than just creating them one at a time? I hope so, because that’s what I started doing, but stopped because that could take me hours.
Thanks,
Ray
you could use a brush pack for the particle effects just google brush particle effects